Wooden Serving Tray Projects That Sell Well Year-Round

Wooden Serving Tray Projects That Sell Well Year-Round

Wooden Serving Tray Projects That Sell Well Year-Round

Wooden serving trays are versatile and practical items that can be used for a variety of purposes, making them a popular choice for crafters and entrepreneurs. These trays can be customized with various finishes, designs, and functionalities, catering to diverse tastes and needs. By understanding the key elements that make wooden serving trays desirable, you can create products that sell well year-round.

Factors that Contribute to Year-Round Sales

Wooden serving trays hold enduring appeal due to their versatility, aesthetic appeal, and practicality. They can be utilized for various occasions and purposes, catering to a wide range of customers throughout the year.

Versatility and Functionality

Wooden serving trays offer a versatile platform for serving food, beverages, and other items. Their practicality extends beyond serving, as they can also be used for organizing, displaying, and gifting.

  • Food and Beverage Serving: Wooden serving trays are ideal for presenting appetizers, desserts, coffee, tea, and cocktails. Their natural warmth and rustic charm enhance the dining experience.
  • Organization and Display: Trays can be used to organize toiletries, cosmetics, jewelry, or to display decorative items, candles, and small plants.
  • Gifting: Wooden serving trays make thoughtful and practical gifts for housewarmings, weddings, birthdays, and holidays.

Aesthetic Appeal

Wooden serving trays possess a timeless aesthetic that blends seamlessly with various décor styles. Their natural wood grain adds warmth and character to any setting.

  • Rustic Charm: The natural wood grain and texture contribute to a rustic and inviting aesthetic, appealing to those who appreciate handcrafted items.
  • Modern Simplicity: Smooth, polished wood finishes provide a sleek and modern look that complements contemporary interiors.
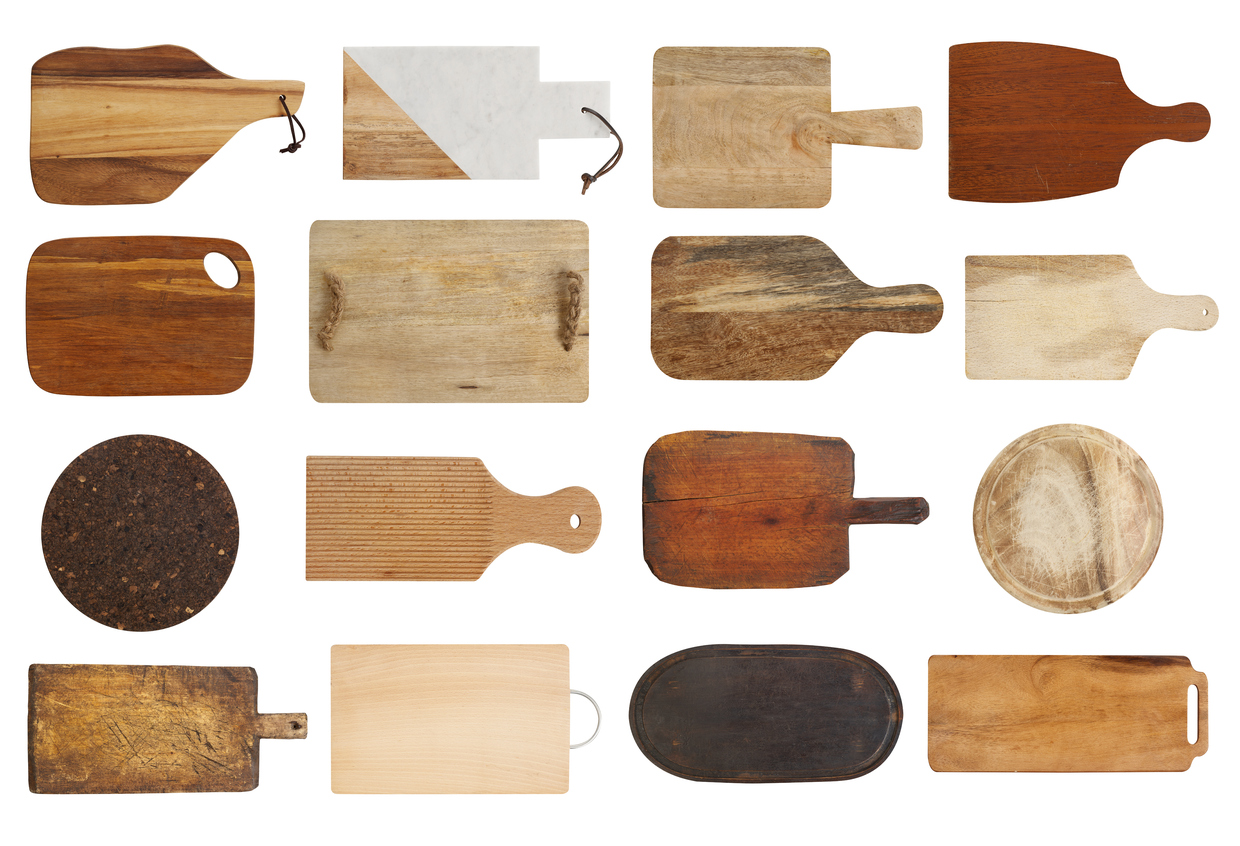
  • Customization: The ability to personalize trays with custom designs, engravings, or painted accents allows for a unique and personalized touch.

Durability and Sustainability

Wooden serving trays are known for their durability and longevity, making them a sustainable choice. They can withstand regular use and are less likely to crack or break compared to other materials.

  • Natural Material: Wood is a renewable resource, making it an environmentally friendly choice for crafting serving trays.
  • Durability: High-quality wood is sturdy and can withstand the wear and tear of everyday use.
  • Longevity: Properly cared for wooden serving trays can last for generations, making them a valuable heirloom.

Crafting Ideas for Wooden Serving Trays

By understanding the key elements that contribute to year-round sales, you can create wooden serving trays that cater to diverse customer needs and preferences.

Seasonal Themes

Incorporate seasonal themes into your designs to capture the spirit of different times of the year.

  • Spring: Create trays with floral motifs, pastel colors, and delicate designs.
  • Summer: Design trays with nautical themes, beachy colors, and tropical patterns.
  • Fall: Incorporate autumnal colors, leaves, and harvest-themed motifs.
  • Winter: Design trays with wintery scenes, snowflakes, and festive colors.

Functional Features

Consider adding functional features to enhance the practicality and value of your wooden serving trays.

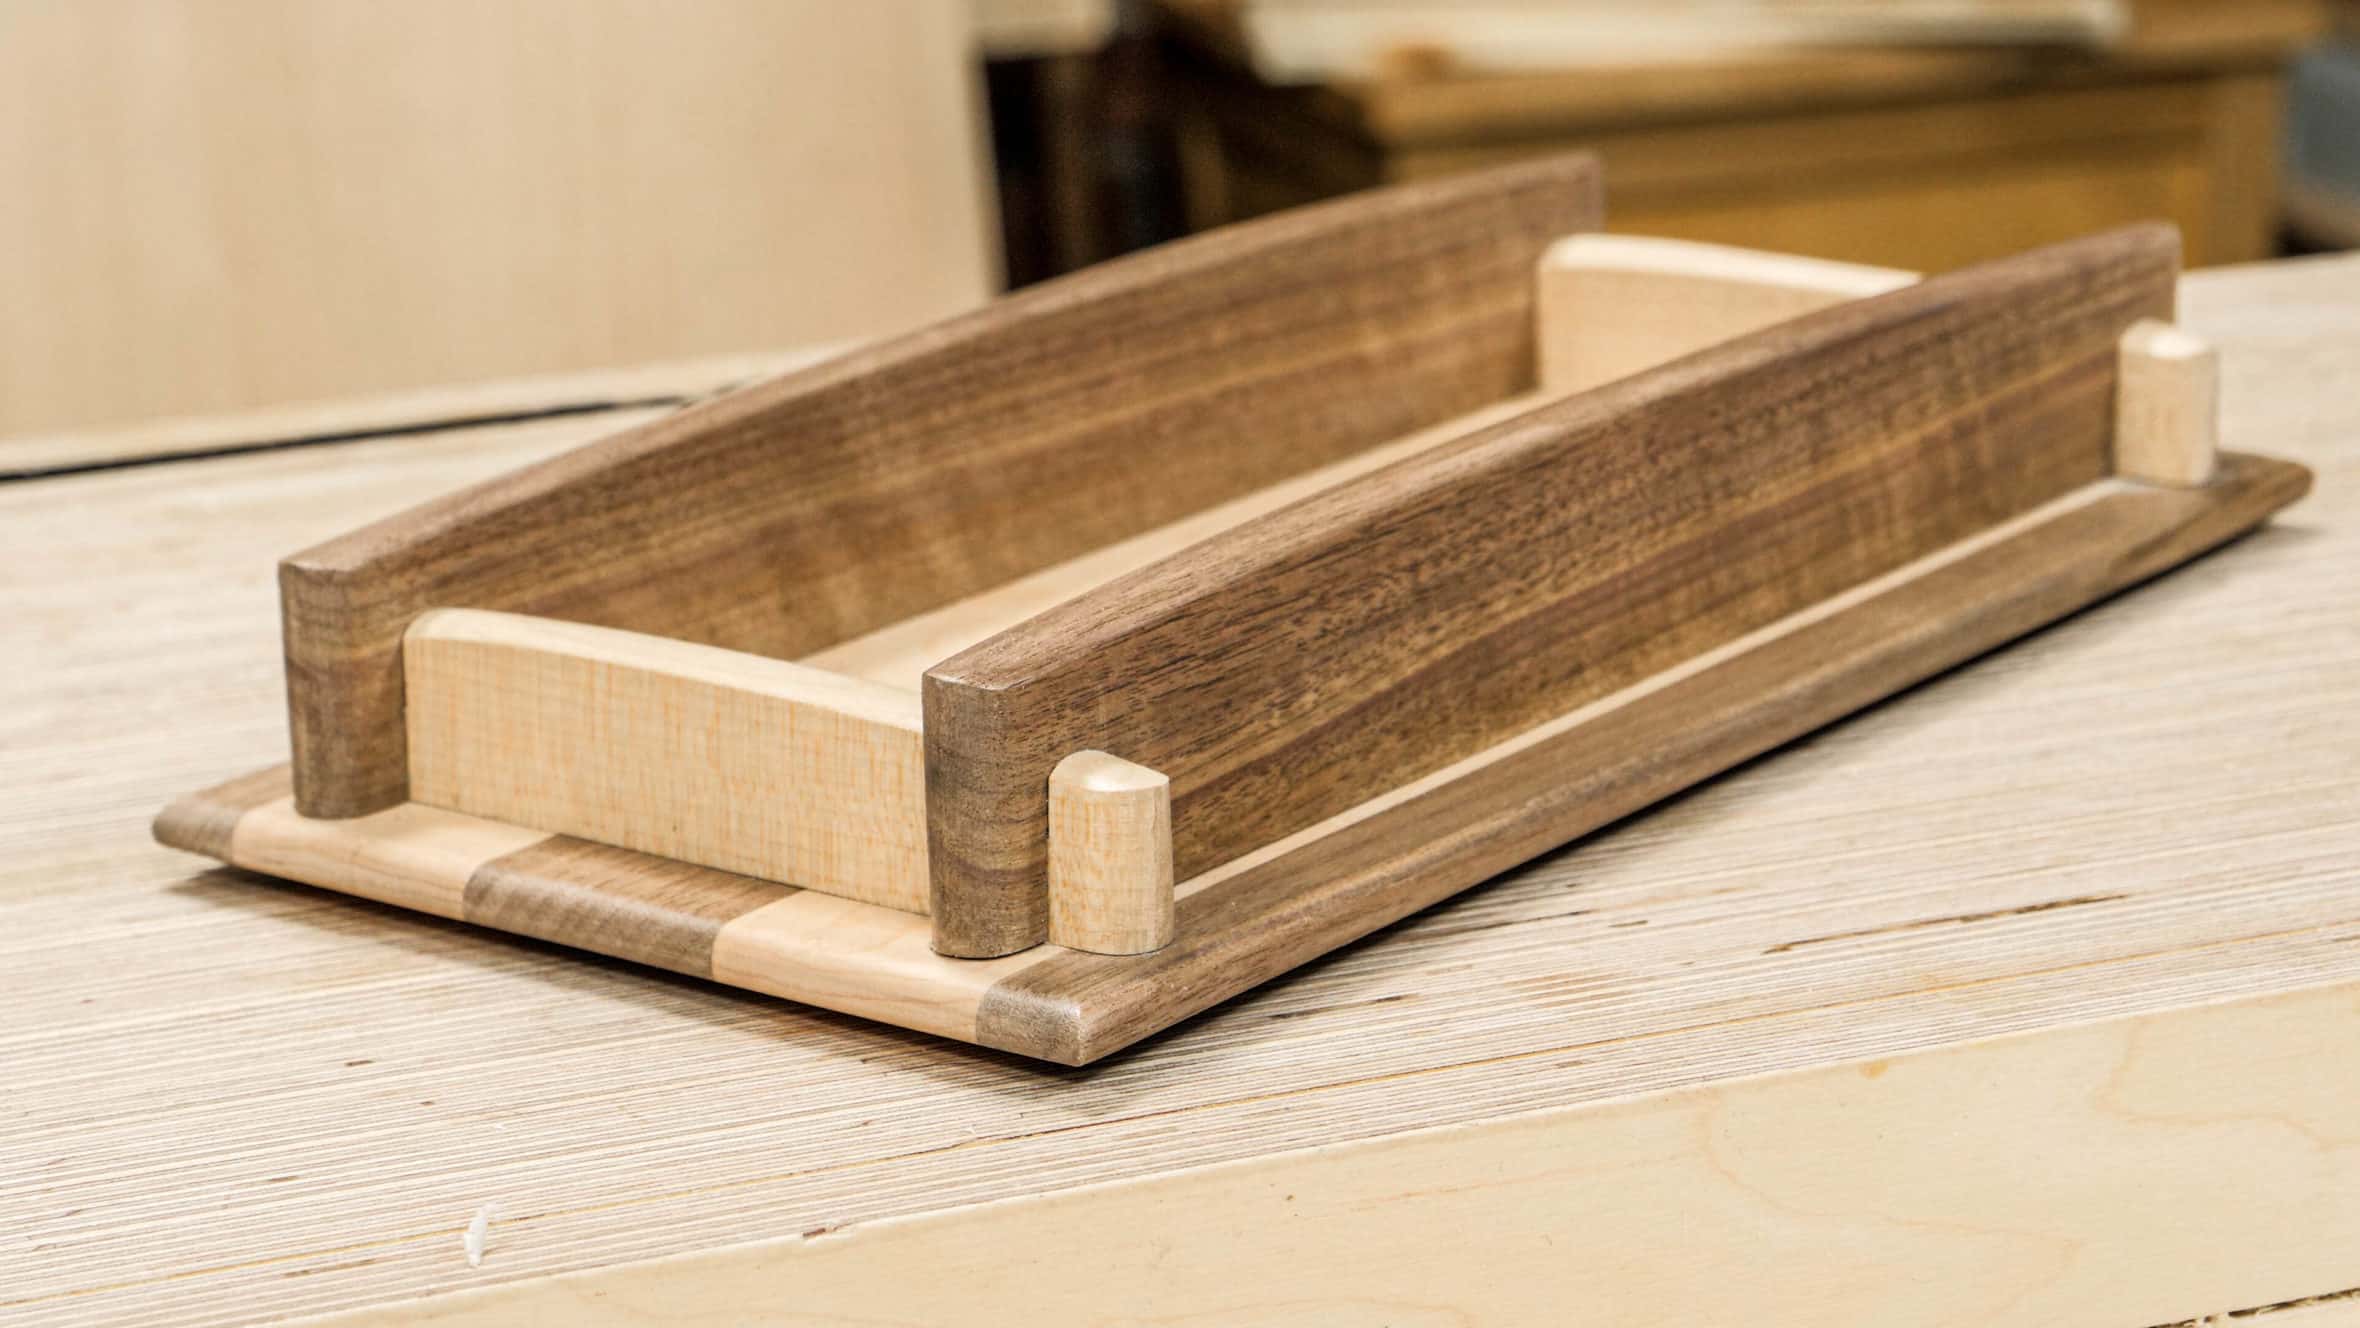
  • Handles: Include handles for easy carrying and transport.
  • Dividers: Incorporate dividers to separate different items, such as snacks, drinks, or utensils.
  • Storage Compartments: Add built-in storage compartments for small items, such as tea bags or sugar packets.
  • Wine Bottle Holders: Design trays with a built-in wine bottle holder for entertaining and gifting.

Customizable Options

Offer customizable options to allow customers to personalize their trays with their own unique touches.

  • Engraving: Allow customers to personalize their trays with engraved names, dates, or special messages.
  • Painted Accents: Offer custom painting services, allowing customers to choose colors and patterns that match their style.
  • Wood Finishes: Provide a range of wood finishes, such as stains, varnishes, and waxes, to allow customers to achieve their desired look.

Marketing and Sales Strategies

Promote your wooden serving tray creations through a variety of channels to reach a wide audience.

Online Platforms

Utilize online platforms to showcase your products and reach a global market.

  • Etsy: Etsy is a popular marketplace for handcrafted and vintage items, ideal for selling unique wooden serving trays.
  • Amazon Handmade: Amazon Handmade is another platform where you can sell handcrafted items, including wooden serving trays.
  • Your Own Website: Creating your own website gives you greater control over your brand and allows for direct sales.

Local Markets and Events

Participate in local markets, craft fairs, and events to connect with potential customers in person.

  • Craft Fairs: Many communities host craft fairs throughout the year, providing opportunities to showcase and sell your wooden serving trays.
  • Farmers Markets: Farmers markets offer a platform to sell your products alongside other local artisans and food vendors.
  • Holiday Markets: Holiday markets provide a festive setting for selling wooden serving trays that are perfect for holiday entertaining and gifting.

Social Media Marketing

Use social media platforms to share your products, connect with customers, and build brand awareness.

  • Instagram: Instagram is an ideal platform for showcasing visually appealing wooden serving trays, using high-quality photos and videos.
  • Facebook: Facebook allows you to create a business page, share your products, engage with customers, and run targeted advertising campaigns.
  • Pinterest: Pinterest is a visual search engine where you can create boards featuring your wooden serving trays, attracting customers who are searching for inspiration and ideas.

Conclusion

Wooden serving trays are versatile, aesthetically pleasing, and practical items that hold enduring appeal. By understanding the factors that contribute to year-round sales and by implementing effective marketing and sales strategies, you can create a successful business selling handcrafted wooden serving trays. Whether you focus on seasonal themes, functional features, or customizable options, there is a market for unique and well-crafted wooden serving trays.

Share:

Profitable Key Rack Projects to Make and Sell

Profitable Key Rack Projects to Make and Sell

Profitable Key Rack Projects to Make and Sell

Looking for a creative and profitable side hustle? Key racks offer a unique and practical way to earn extra income. These essential home accessories are always in demand, and you can easily customize them to appeal to a wide range of customers. This article explores some profitable key rack projects you can start making and selling today.

Key Rack Project Ideas

The beauty of key racks lies in their versatility. You can craft them from various materials and adapt them to different styles and themes. Here are some key rack project ideas to get your creative juices flowing:

Rustic Wood Key Racks

Embrace the charm of rustic wood to create key racks that exude warmth and character. Use reclaimed wood, driftwood, or salvaged pieces to add an authentic touch. You can stain or paint the wood to suit your style and create key racks that complement any décor.

  • Simple Key Rack: A straightforward design using a single piece of wood with hooks attached.
  • Key Rack with Shelf: Include a small shelf for additional storage, perfect for holding mail or keys.
  • Key Rack with Coat Hooks: Combine a key rack with coat hooks for a versatile storage solution.
  • Metal Key Racks

    Metal key racks offer durability and a modern aesthetic. Experiment with different metals, finishes, and shapes to create unique pieces. Pipe fittings, wire, and sheet metal are great starting materials for creating key racks.

  • Industrial Style Key Rack: Use galvanized pipes and fittings to create a bold and trendy key rack.
  • Geometric Key Rack: Shape metal wire into geometric designs, creating an abstract and eye-catching piece.
  • Wall-Mounted Key Rack: Cut metal sheets into shapes and add hooks for a minimalist key rack.
  • Upcycled Key Racks

    Upcycling old items into key racks is both eco-friendly and cost-effective. Use items like vintage ladders, repurposed doors, or discarded furniture pieces to create one-of-a-kind key racks. The unique character of these materials will add personality and charm to your creations.

  • Ladder Key Rack: Transform a vintage ladder into a stylish key rack by adding hooks to the rungs.
  • Door Key Rack: Recycle an old door by attaching hooks to the surface, creating a functional and decorative wall piece.
  • Furniture Key Rack: Repurpose an old dresser drawer or bookshelf into a key rack by adding hooks and shelves.
  • Marketing Your Key Racks

    Once you have your key rack projects ready, it's time to get them in front of potential customers. Utilize various marketing channels to maximize your reach.

  • Online Marketplaces: List your key racks on popular online marketplaces like Etsy, Amazon Handmade, and eBay.
  • Social Media: Showcase your key racks on platforms like Instagram, Pinterest, and Facebook, using eye-catching photos and videos.
  • Local Craft Shows: Participate in local craft fairs and farmers' markets to connect with potential customers in person.
  • Word-of-Mouth: Spread the word about your key racks through friends, family, and local networks.
  • Tips for Success

    Here are some tips to help you make your key rack business a success:

  • High-Quality Materials: Use durable and reliable materials for your key racks to ensure longevity and customer satisfaction.
  • Unique Designs: Craft key racks with distinctive styles and themes to stand out from the competition.
  • Competitive Pricing: Research market prices and set your prices competitively, ensuring you're making a profit while remaining appealing to customers.
  • Excellent Customer Service: Provide prompt and friendly service to build strong relationships with customers and encourage repeat business.
  • Promote Your Products: Actively market your key racks online and offline to reach a wider audience.
  • Making and selling key racks can be a rewarding and profitable venture. Embrace your creativity, experiment with different materials and styles, and market your products effectively. By following these tips, you can turn your passion for crafting into a successful side hustle.

    Share:

    How to Use Free Woodworking Plans to Create Beautiful Custom Pieces

    How to Use Free Woodworking Plans to Create Beautiful Custom Pieces

    Harnessing the Power of Free Woodworking Plans: Crafting Exquisite Custom Pieces

    The allure of woodworking lies in the ability to transform raw materials into stunning, functional objects that bring beauty and utility to our lives. While the prospect of embarking on a woodworking project can seem daunting, the availability of free woodworking plans offers an accessible and rewarding path to crafting your own custom pieces. This comprehensive guide delves into the world of free woodworking plans, empowering you to harness their power and embark on a journey of creative woodworking.

    Embracing the World of Free Woodworking Plans

    Free woodworking plans serve as blueprints, providing detailed instructions, diagrams, and material lists to guide you through the construction process. They empower you to create a wide array of projects, from simple shelves and birdhouses to intricate furniture and decorative pieces. These plans are readily accessible online and offer a wealth of design inspiration, catering to all skill levels and interests.

    The Advantages of Utilizing Free Woodworking Plans

    Embracing free woodworking plans comes with numerous benefits:

    • Cost-Effectiveness: Free plans eliminate the expense of purchasing paid plans, allowing you to allocate your budget towards materials and tools.
    • Accessibility and Variety: A vast library of free plans is readily available online, providing a wide range of projects to choose from, catering to diverse skill levels and tastes.
    • Learning and Growth: Following detailed plans helps you develop woodworking skills, gain a deeper understanding of construction techniques, and expand your knowledge of woodworking principles.
    • Creative Expression: Free plans offer a starting point, allowing you to customize designs, experiment with different materials, and add your personal touch, making each project uniquely yours.

    Navigating the Landscape of Free Woodworking Plans

    With the abundance of resources available, it's crucial to navigate the landscape of free woodworking plans effectively. Here's a guide to help you find the perfect plan for your next project:

    Identifying Your Needs and Skill Level

    Before diving into the world of free woodworking plans, assess your needs and skill level. Consider the following:

    • Project Type: What kind of project are you envisioning? Furniture, home décor, outdoor projects, or something else?
    • Complexity: Are you a beginner, intermediate, or advanced woodworker? Choose plans that align with your skill level to ensure a successful and enjoyable experience.
    • Materials and Tools: Do you have access to specific materials or tools? Consider plans that utilize readily available resources and equipment.
    • Time Commitment: How much time are you willing to dedicate to the project? Choose plans that fit your time constraints.

    Exploring Trusted Online Resources

    Numerous reputable websites and online communities offer free woodworking plans. Here are some notable sources:

    • Ana White: A popular resource with a vast library of free woodworking plans covering a wide range of projects.
    • Woodworking for Mere Mortals: A comprehensive website with step-by-step plans, tutorials, and woodworking tips.
    • Free Plans Woodworking: A dedicated website offering an extensive collection of free plans for various projects.
    • Pinterest: A visual search engine where you can find numerous woodworking plans and inspiration for your projects.
    • Woodworking Forums: Online communities where woodworkers share plans, advice, and support.

    Bringing Your Woodworking Vision to Life

    Once you've chosen a free woodworking plan, it's time to bring your vision to life. Follow these steps to ensure a successful and fulfilling woodworking experience:

    Reviewing the Plans Thoroughly

    Before starting any project, meticulously review the plans, paying attention to:

    • Material List: Ensure you have all the necessary materials in the right quantities and dimensions.
    • Tool List: Gather the required tools, making sure they are in good working condition.
    • Cutting Diagrams: Understand the layout and dimensions of each piece, ensuring accuracy in your cuts.
    • Assembly Instructions: Carefully study the assembly process, ensuring you understand each step.

    Preparing Your Workspace and Materials

    Create a safe and organized workspace. Ensure proper lighting, ventilation, and adequate space for working on the project. Prepare your materials by:

    • Cutting: Accurately cut the wood to the specified dimensions, using a saw that suits the project.
    • Sanding: Smooth the edges and surfaces of the wood, ensuring a clean and professional finish.
    • Preparing for Assembly: Dry-fit the pieces before assembling them, ensuring a proper fit and alignment.

    Following the Plans with Precision

    Adhering to the plans meticulously is crucial for a successful outcome. Follow the instructions carefully, ensuring precision in every step. Take your time, and don't rush the process. If you encounter any difficulties, consult additional resources or seek advice from experienced woodworkers.

    Finishing Touches and Pride in Craftsmanship

    Once the project is assembled, apply finishing touches to enhance its appearance and durability. Consider:

    • Sanding: Smooth any imperfections and achieve a desired finish.
    • Staining or Painting: Apply a protective finish to enhance the wood's natural beauty or create a desired color.
    • Hardware: Install hinges, handles, or other hardware components as needed.
    • Sealing: Protect the wood from moisture and wear with a clear sealant or varnish.

    Beyond the Plans: Unleashing Your Creativity

    Free woodworking plans serve as excellent starting points, but don't be afraid to experiment and personalize your projects. Unleash your creativity by:

    • Customizing Designs: Modify the plans to fit your unique needs or aesthetic preferences.
    • Experimenting with Materials: Explore different types of wood, hardware, or finishing techniques to create a one-of-a-kind piece.
    • Adding Personal Touches: Incorporate your own design elements, such as carvings, inlay work, or painted details, to make the project truly yours.

    The Journey of Woodworking: A Rewarding Experience

    Utilizing free woodworking plans opens a door to a world of creativity, skill development, and self-fulfillment. As you embark on your woodworking journey, embrace the challenges, celebrate the successes, and enjoy the rewarding process of crafting custom pieces that bring joy and beauty to your life. Remember, the true value of woodworking lies not only in the finished product but also in the journey of learning, creating, and expressing yourself through the craft.

    Share:

    Stylish Picture Frame Ideas for Every Taste

    Stylish Picture Frame Ideas for Every Taste

    Stylish Picture Frame Ideas for Every Taste

    Picture frames are more than just functional holders for your favorite memories. They're essential design elements that can elevate your home décor and showcase your unique style. From classic to contemporary, there's a picture frame for every taste and budget. Let's dive into a world of creative picture frame ideas that will inspire you to transform your walls and celebrate your cherished moments in style.

    Classic Elegance

    For those who appreciate timeless beauty, classic picture frames offer a touch of sophistication. Think polished wood frames in rich mahogany or walnut tones, detailed moldings with delicate carvings, and a hint of antique charm. These frames work beautifully with black and white photos, vintage prints, and family portraits.

    Framing Options:

    • Ornate Gold Frames: Create a regal ambiance with ornate gold frames, perfect for formal settings or showcasing heirloom photos.
    • Simple Wooden Frames: Opt for simple wooden frames in natural wood finishes to create a warm and inviting atmosphere.
    • Black Frames: Black frames provide a timeless and elegant backdrop for any photograph, especially those with a vintage feel.

    Modern Minimalism

    If you embrace clean lines, simple shapes, and a streamlined aesthetic, modern picture frames are perfect for you. These frames are characterized by their minimalist design, often featuring thin, uncluttered profiles and neutral colors. They allow your photos to take center stage, making them ideal for contemporary spaces.

    Framing Options:

    • Thin Metal Frames: Thin metal frames in silver, gold, or black provide a modern and sleek touch, accentuating the sharp edges of the photograph.
    • Acrylic Frames: Acrylic frames offer a transparent and lightweight option, allowing the artwork to stand out without any distractions.
    • Floating Frames: Floating frames create the illusion that the photo is suspended in mid-air, adding a touch of contemporary flair.

    Bohemian Flair

    Embrace a free-spirited and eclectic vibe with bohemian picture frames. These frames often incorporate natural materials, vibrant colors, and intricate patterns. Think woven rattan, macrame, and colorful tapestries. They're ideal for showcasing travel photos, landscapes, and artistic prints.

    Framing Options:

    • Macrame Frames: Macrame frames add a touch of handcrafted beauty and a bohemian vibe, perfect for showcasing nature-inspired photographs.
    • Rattan Frames: Rattan frames bring a touch of rustic charm and natural texture, perfect for incorporating into a boho-chic décor.
    • Painted Wooden Frames: Use colorful paints or decorative techniques to create unique and eye-catching frames that reflect your personality.

    Creative Gallery Walls

    Go beyond single frames and create stunning visual statements with gallery walls. Mix and match different picture frame styles, sizes, and colors to create a dynamic and personalized display. Gallery walls are a fantastic way to showcase a collection of photos, art prints, or family heirlooms.

    Design Tips:

    • Create a Theme: Choose a theme that reflects your personal style, whether it's travel, nature, or family.
    • Mix and Match: Mix different frame styles and sizes to add visual interest and create a dynamic display.
    • Use a Grid Layout: A grid layout provides a clean and organized aesthetic, allowing you to showcase multiple photographs or prints.

    Whether you're a minimalist or a maximalist, there's a picture frame out there to complement your style and enhance your home décor. Embrace the power of picture frames to elevate your spaces, celebrate your memories, and add a personal touch to your walls.

    Share:

    How to Choose Your First Woodworking Project as a Beginner

    How to Choose Your First Woodworking Project as a Beginner

    Choosing Your First Woodworking Project: A Beginner's Guide

    Alright, you’ve got the itch. You've been scrolling through Pinterest and Instagram, admiring all the beautiful handmade furniture and home décor. You're ready to dive into woodworking, but where do you start? Choosing your first woodworking project as a beginner can be daunting. You want something manageable, rewarding, and, of course, something that doesn’t require you to sell a kidney to buy the tools.

    Don't worry! We’re here to guide you through the process of selecting that perfect first project. We'll break it down into easy-to-follow steps and sprinkle in some helpful tips along the way. Let's get started!

    Step 1: Define Your Goals

    First, take a moment to reflect on what you want to achieve with your woodworking project. Are you looking to:

    • Create a functional piece of furniture?
    • Decorate your home with handmade items?
    • Master a specific woodworking technique?
    • Simply enjoy the process of creating something with your hands?

    Knowing your goals will help you narrow down your project options and choose something that truly excites you.

    Step 2: Consider Your Skill Level

    Remember, you're a beginner! Don't try to tackle a complex project like a Shaker rocking chair right off the bat. Starting with something simple and manageable will build your confidence and prevent frustration. Aim for a project that:

    • Involves basic woodworking techniques like cutting, sanding, and finishing.
    • Has clear instructions and a straightforward design.
    • Doesn’t require specialized tools or materials.

    Think about what you're comfortable with and what you're willing to learn. Remember, woodworking is a journey, not a race!

    Step 3: Explore Project Ideas

    Now comes the fun part: brainstorming! There are tons of beginner-friendly woodworking projects out there. Here are a few popular options to get your creative juices flowing:

    Small & Simple

    • Cutting board: A classic woodworking project that's perfect for practicing your cutting skills.
    • Wooden box: A great way to learn about joinery and finishing.
    • Coaster set: A fun and quick project that's ideal for gifting.
    • Picture frame: An excellent way to personalize your home décor.
    • Birdhouse: An outdoor project that's both functional and visually appealing.

    Functional & Decorative

    • Small shelf: Perfect for adding storage and style to any room.
    • Plant stand: A great way to showcase your greenery and practice working with curves.
    • Side table: A versatile piece of furniture that can be used in any room.
    • Bench: A functional and stylish piece for your garden or patio.

    Don't be afraid to get creative! If you have a specific piece of furniture or décor item in mind, look for simplified plans or tutorials online. There are countless resources available to help you bring your vision to life.

    Step 4: Gather Your Materials & Tools

    Once you've chosen your project, it's time to gather the necessary materials and tools. Remember, you don't need to have a fully stocked workshop to get started! You can start with a few basic tools and gradually add more as you progress.

    Essential Tools for Beginners

    • Hand saw: A versatile tool for making straight cuts.
    • Measuring tape: Essential for accurate measurements.
    • Hammer: For driving nails and securing joints.
    • Screwdriver: For attaching screws and assembling your project.
    • Sandpaper: For smoothing out surfaces and creating a beautiful finish.
    • Safety glasses: Always protect your eyes when working with wood.
    • Dust mask: Protect yourself from wood dust.
    • Work gloves: A must-have for protecting your hands.

    For your first project, you can likely find most of these tools at your local hardware store. If you plan to tackle more complex projects in the future, consider investing in a basic power tool set that includes a drill/driver, circular saw, and sander.

    Step 5: Find the Right Instructions

    You've got your project, your tools, and your materials, but you're still missing one key ingredient: instructions. Choose a plan that fits your skill level and includes detailed step-by-step instructions and diagrams.

    Here are some great resources for finding woodworking plans:

    • Online woodworking communities: Websites like Woodworking.org and Lumberjocks.com offer a wealth of free and paid woodworking plans.
    • Woodworking magazines: Publications like Popular Woodworking and Fine Woodworking feature a wide range of projects and expert tips.
    • YouTube tutorials: Search for your chosen project on YouTube and you'll find countless tutorials from experienced woodworkers.

    Take your time to read through the instructions carefully and make sure you understand each step before you begin.

    Step 6: Practice Makes Perfect

    As you work on your project, remember that mistakes are part of the learning process. Don't get discouraged if something doesn't go according to plan! Woodworking is about trial and error, and each mistake is an opportunity to learn and improve.

    Start with small, simple cuts and practice using your tools before you start on your project. Remember, patience and persistence are key to success in woodworking.

    Step 7: Enjoy the Process

    Most importantly, have fun! Woodworking is a relaxing and rewarding hobby that allows you to express your creativity and connect with your inner maker. Enjoy the journey, and don't be afraid to experiment and learn along the way!

    Frequently Asked Questions

    How Much Does Woodworking Cost?

    The cost of woodworking depends on the project you choose and the quality of materials and tools you use. Basic projects like cutting boards or coasters can be done for under $20, while more complex projects can cost hundreds or even thousands of dollars. If you're on a budget, consider using reclaimed wood or buying materials in bulk.

    What Kind of Wood Should I Use for My First Project?

    For beginner projects, softwoods like pine, fir, and cedar are good choices. They're relatively inexpensive and easy to work with. If you're looking for a more durable wood, hardwoods like maple, cherry, and oak are excellent options, but they can be more expensive.

    Where Can I Find Woodworking Classes?

    Many community colleges and woodworking schools offer introductory woodworking classes for beginners. You can also find workshops and classes at local hardware stores or home improvement centers.

    What If I Make a Mistake?

    Don't worry! Mistakes are a natural part of learning. Use sandpaper or a chisel to fix small errors, and don't be afraid to start over if needed. The most important thing is to learn from your mistakes and keep practicing.

    Woodworking is a wonderful hobby that offers endless possibilities for creativity and satisfaction. Don't be afraid to take the leap and start your woodworking journey! With a little patience, practice, and passion, you'll be crafting beautiful projects in no time.

    Share:

    How to Build Wooden Jewelry Boxes with Removable Trays for Added Flexibility

    How to Build Wooden Jewelry Boxes with Removable Trays for Added Flexibility

    Building Wooden Jewelry Boxes with Removable Trays: A Step-by-Step Guide

    Are you tired of sifting through a tangled mess of necklaces and earrings? Do you dream of a dedicated space for your precious jewelry? Then building a custom wooden jewelry box with removable trays is the perfect solution. It’s not only a practical storage solution, but also a rewarding DIY project that allows you to create a beautiful piece tailored to your specific needs.

    This detailed guide will walk you through each step, from selecting the right materials to finishing touches. By the end, you’ll have a sturdy, elegant jewelry box that will protect and organize your treasures for years to come.

    Step 1: Gather Your Materials

    Before you start, make sure you have everything you need.

    Wood:

    • Choose hardwood like cherry, maple, or walnut for durability and elegance.
    • Softwoods like pine or cedar are budget-friendly options, but they may be less resistant to scratches.
    • Select wood with consistent grain pattern and minimal knots.
    • Consider using plywood for the box base and sides for a budget-friendly option.

    Hardware:

    • Wood screws: Choose lengths based on the thickness of your wood.
    • Wood glue: A high-quality wood glue ensures a strong bond.
    • Hinges: Select sturdy hinges for the box lid, preferably with a self-closing mechanism.
    • Small drawer slides: Use ball-bearing slides for smooth tray movement.
    • Optional: Magnetic catches for the lid or a decorative handle for the box.

    Tools:

    • Miter saw or table saw for precise cuts.
    • Power drill with various drill bits.
    • Sandpaper (various grits).
    • Clamps.
    • Measuring tape and pencil.
    • Woodworking chisels or a router (optional for intricate designs).
    • Finish of your choice: Stain, paint, varnish, oil, or wax.

    Step 2: Design and Layout

    Now, it's time to plan your jewelry box. Think about the following:

    • Size: Determine the desired dimensions of your box and trays. Consider the amount of jewelry you need to store.
    • Tray Configuration: Decide on the number and size of the trays you want. Consider a combination of small and large trays for varying jewelry sizes.
    • Design Features: Do you want a simple rectangular box or a more elaborate design with curves or decorative elements?

    Create a detailed sketch with measurements for each component. If you’re not confident in your woodworking skills, you can find online design templates to help you visualize the project and create accurate measurements.

    Step 3: Cutting the Wood

    Use your miter saw or table saw to make precise cuts according to your design. Be sure to carefully measure twice and cut once to avoid any mistakes.

    Cutting the Box Sides and Base:

    Cut four pieces for the box sides (the height should match your desired box height), and one piece for the base (the dimensions should be equal to the width and depth of your box).

    Cutting the Trays:

    For each tray, cut two pieces for the sides (matching your desired tray height) and two pieces for the top and bottom (matching the width and depth of your tray). Repeat this for each tray in your design.

    Step 4: Assembling the Box

    With all the pieces cut, you're ready to assemble the box. Start with the base and sides.

    Attaching the Sides:

    Using wood glue and screws, attach the box sides to the base. Make sure the sides are aligned and flush with the base. Use clamps to hold the pieces in place while the glue dries.

    Constructing the Trays:

    Assemble each tray by gluing and screwing the sides, top, and bottom together. Allow the glue to dry completely before moving on.

    Step 5: Installing the Trays

    Attach the drawer slides to the inside of the box and the bottom of each tray. This will allow the trays to slide smoothly in and out of the box.

    Installing the Drawer Slides:

    • Mark the location for the drawer slides on the inside of the box and the bottom of each tray.
    • Using screws, attach the slides to the designated locations.
    • Test the slide action to ensure smooth movement.

    Step 6: Adding the Lid

    With the trays installed, it’s time to attach the lid.

    Cutting the Lid:

    Cut the lid piece slightly larger than the box opening to allow for a snug fit. Make sure the lid is cut to your desired angle for the lid.

    Attaching the Hinges:

    • Mark the positions for the hinges on the lid and box.
    • Using screws, attach the hinges to the lid and box.
    • Align the lid and box to check the hinge alignment.
    • Adjust the hinges as needed for a smooth opening and closing motion.

    Optional: Adding Magnetic Catches or a Handle:

    • If desired, install magnetic catches on the lid and box to keep the lid securely closed.
    • Attach a decorative handle to the lid for easy access.

    Step 7: Finishing Touches

    Now it’s time to give your jewelry box a beautiful and protective finish.

    Sanding:

    Sand all surfaces of the box and trays with progressively finer grits of sandpaper. This will create a smooth surface and eliminate any rough edges.

    Applying Finish:

    • Choose a finish that suits your style and the type of wood you used.
    • Apply the finish according to the manufacturer's instructions.
    • Allow the finish to dry completely before handling the box.

    Step 8: Enjoy Your New Jewelry Box!

    Congratulations! You have successfully built a beautiful and functional wooden jewelry box with removable trays. Now, proudly display your creation and enjoy the convenience of organizing your jewelry.

    With a little time and effort, you can create a stunning and personalized piece that will serve you for years to come.

    Share:

    Simple Cutting Boards That Sell Fast at Craft Shows

    Simple Cutting Boards That Sell Fast at Craft Shows

    Simple Cutting Boards That Sell Fast at Craft Shows

    Crafting and selling items at craft shows can be a rewarding experience. With a bit of creativity and planning, you can create products that appeal to customers and generate income. One popular item that always seems to attract attention is cutting boards. They are functional, decorative, and can be customized to fit any style.

    But how do you create cutting boards that will stand out from the crowd and sell fast? The key is to focus on simplicity, functionality, and appealing aesthetics. Here are some ideas for simple cutting boards that are sure to be a hit at craft shows:

    The Classic Cutting Board

    This is a timeless design that never goes out of style. A classic cutting board is typically rectangular or square, made from a single piece of wood. It can be finished with a simple oil and wax treatment or a more elaborate stain and varnish.

    Tips for Making a Classic Cutting Board

    • Choose a durable hardwood like maple, cherry, or walnut.
    • Cut the board to a standard size, such as 12x18 inches or 14x20 inches.
    • Sand the board thoroughly to create a smooth finish.
    • Apply a food-safe oil and wax finish for protection and water resistance.
    • Consider adding a juice groove around the perimeter to catch drips.

    The Serving Board

    A serving board is a versatile piece that can be used for serving cheese, charcuterie, appetizers, and more. It can be made from a variety of woods and can be decorated with intricate carvings, burned designs, or simply a natural finish.

    Tips for Making a Serving Board

    • Use a hardwood like walnut or cherry for a rich color and grain pattern.
    • Shape the board with rounded edges for a comfortable grip and a sleek look.
    • Add a handle or a built-in serving area for a more unique design.
    • Finish the board with a food-safe oil and wax or a natural stain.
    • Optional: Include a small cheese knife or a set of serving utensils.

    The Small Cutting Board

    Smaller cutting boards are perfect for individual use, such as chopping vegetables or preparing a small meal. They are also great for gifts and can be easily customized with different wood types, sizes, and finishes.

    Tips for Making a Small Cutting Board

    • Use a softer wood like pine or cedar for a more affordable option.
    • Cut the board to a compact size, such as 8x10 inches or 6x8 inches.
    • Add a decorative handle or a small groove for hanging.
    • Consider incorporating a unique design or a personalized message.

    The Cutting Board Set

    Offer a variety of cutting board sizes and shapes in a set for a more attractive option. You can include a large cutting board, a smaller board, and a serving board. The set can be packaged in a nice box or wrapped in a decorative paper.

    Tips for Making a Cutting Board Set

    • Use different wood types for each board in the set to create a visual contrast.
    • Consider adding a small, decorative element like a leather strap or a metal tag to the set.
    • Present the set in a reusable bag or box.

    Adding Personalization and Value

    To make your cutting boards more appealing, you can offer customization options. Customers may want their names, initials, a special date, or a quote engraved on the board. You can also offer a variety of wood types and finishes for customers to choose from.

    Tips for Personalization

    • Invest in a laser engraver or a wood burning tool to create personalized designs.
    • Offer a selection of fonts and styles for engravings.
    • Allow customers to select their preferred wood type and finish.
    • Consider offering add-ons like a small wooden stand, a recipe card holder, or a leather strap.

    Marketing Your Cutting Boards

    Once you've created your cutting boards, it's important to market them effectively. Here are some tips for promoting your products at craft shows:

    Tips for Marketing Your Cutting Boards

    • Use eye-catching displays to showcase your boards. You can create a tiered stand, hang them on a wall, or arrange them on a table with decorative accents.
    • Offer samples or demonstrations to show off the functionality and durability of your boards.
    • Provide clear and concise product information, including the type of wood, the finish, and the dimensions.
    • Offer discounts or special promotions to attract customers.
    • Engage with customers and answer their questions. Provide helpful tips on caring for cutting boards and share recipes that use cutting boards.
    • Collect customer contact information so you can send them updates about your products and future events.

    Safety and Care

    Make sure to use food-safe oils and finishes for your cutting boards. Inform your customers about proper care instructions, including hand-washing with soap and water and avoiding harsh detergents or abrasive cleaning tools. Remind customers not to soak the boards in water for extended periods, as this can damage the wood.

    Conclusion

    Simple cutting boards can be a popular item at craft shows. By focusing on quality materials, appealing designs, and personal touches, you can create cutting boards that are both functional and decorative. With proper marketing and customer service, you can build a successful business selling cutting boards at craft shows and beyond.

    Share:

    Popular Posts

    Search This Blog

    Powered by Blogger.

    Recent Posts

    Sample Text


    Pages